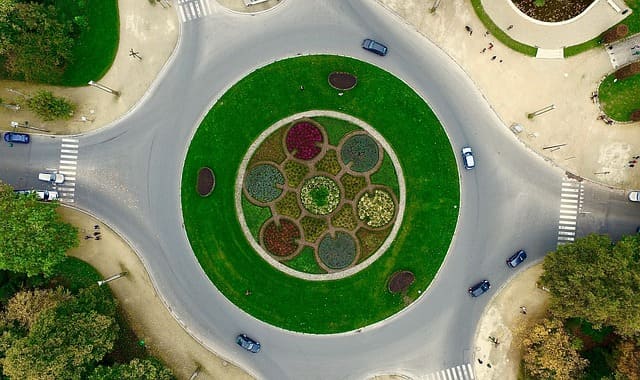
Overview
In the age of digital content creation, drone footage has become synonymous with breathtaking aerial views and smooth, sweeping shots. However, not everyone has access to a drone or the budget to invest in one. The good news is that you can achieve similar cinematic effects using a simple handheld camera. By employing specific techniques and utilizing the right equipment, you can mimic the dynamic perspectives of drone footage, adding a professional touch to your videos without breaking the bank.
This guide will walk you through the essential steps to create drone-like shots with a handheld camera. From choosing the right stabilizers and lenses to mastering smooth movements and creative angles, you’ll learn how to elevate your filming skills. Whether you’re capturing landscapes, events, or cinematic sequences, these methods will help you produce stunning, high-quality footage that captivates your audience. Let’s dive into the world of handheld filming and explore how you can bring your creative visions to life with the tools you already have. Here’s how to get started:
Contents
- Essential Equipment and Preparation
- Techniques for Drone-Like Shots
- Creative Angles and Movements
- Tips for Better Execution
- Summing Up
1. Essential Equipment and Preparation
A. Stabilizer/Gimbal:
Options: Consider stabilizers like the DJI Osmo Mobile for smartphones or the Zhiyun Crane for DSLRs.
Balancing: Properly balance your camera on the stabilizer to reduce shake and achieve fluid movements.
Caution: Always follow the manufacturer’s instructions for balancing and operating your stabilizer or gimbal. Improper balancing can lead to equipment damage or poor performance. Handle all electronic components with care to prevent drops or mishandling.
B. Wide-Angle Lens:
Selection: Use lenses with a focal length of 10-18mm for APS-C sensors or 16-35mm for full-frame sensors.
Effect: This type of lens captures expansive views, akin to drone footage.
Caution: Ensure that your lenses are compatible with your camera model and are securely attached to prevent them from falling off during use. Handle lenses with care to avoid scratches or other damage.
C. Lightweight Setup:
Camera Choice: Opt for lightweight mirrorless cameras, compact DSLRs, or action cameras like GoPros.
Mounting Accessories: Ensure all accessories are securely mounted to avoid adding instability.
Caution: While selecting lightweight equipment can enhance mobility, be cautious of using cameras and accessories that are too lightweight and may feel less stable in your hands. Always secure mounting accessories properly to avoid accidents.
D. Practice Smooth Movements:
Technique: Adopt a “ninja walk” by bending your knees slightly and walking heel-to-toe to minimize vertical movement.
Stability: Keep elbows close to your body to stabilize your arms.
Caution: The “ninja walk” technique requires practice to master. Start by practicing in a safe environment to avoid trips or falls. Pay attention to your surroundings to prevent accidents while filming.
2. Techniques for Drone-Like Shots
A. High Angle Shots:
Elevated Positions: Use ladders, stairs, rooftops, or monopods to capture high-angle shots.
Safety: Always ensure stability and safety when filming from heights.
Caution: Use ladders, stairs, rooftops, or monopods cautiously to capture high-angle shots. Always ensure that the surfaces you use are stable and secure. Never film alone when working at heights; having a spotter or using safety equipment such as harnesses can prevent accidents and falls.
B. Booming:
Execution: Hold the camera above your head and lower it down slowly, or raise it up smoothly from the ground.
Smoothness: Slow, deliberate movements mimic the vertical motion of a drone.
Caution: When holding the camera above your head or lowering it to the ground, maintain a firm grip on your equipment. Be mindful of your surroundings to avoid tripping or dropping the camera. Perform these movements slowly and steadily to achieve smooth footage and prevent injuries.
C. Crane Shots:
DIY Jib: Create a simple jib using a long stick or extendable pole. Attach the camera securely and move it smoothly.
Movement: Start close to the ground and lift it to a higher position or vice versa.
Caution: When creating a DIY jib using a long stick or extendable pole, ensure the camera is securely attached. Test the stability and strength of your setup before use to prevent equipment failure. Practice the movements at lower heights to get comfortable with the technique before attempting higher elevations.
D. Dolly Shots:
Equipment: Utilize a skateboard, wheelchair, or a DIY dolly for smooth, horizontal movement.
Surface: Ensure a smooth, even surface to avoid bumps in your footage.
Caution: Utilize skateboards, wheelchairs, or DIY dollies on smooth, even surfaces to ensure consistent movement. Inspect the equipment beforehand to make sure it is in good condition and capable of supporting your camera setup. Avoid using these on rough or uneven terrain to prevent jolts and potential accidents.
E. Sliding Shots:
Slider: Use a camera slider for precise linear movements, attaching it to a tripod or placing it on a flat surface.
Direction: Move the camera horizontally or diagonally for smooth tracking shots.
Caution: Securely attach the slider to a stable tripod or place it on a flat surface. Double-check all mounts and attachments to ensure they are tight and secure. Move the camera along the slider slowly and deliberately to avoid jerky movements and achieve smooth tracking shots.
F. Slow Motion:
Frame Rate: Shoot at a higher frame rate (60fps or 120fps) for slow-motion playback.
Editing: Slow down footage in post-production to create a smooth, dramatic effect.
Caution: Ensure your camera is set to the appropriate higher frame rate for slow-motion capture. Understand your camera’s limitations to avoid overheating or technical issues and while editing use professional post-production software to slow down footage, ensuring smooth, dramatic effects without compromising quality.
G. Post-Processing:
Stabilization: Use software like Adobe Premiere Pro, Final Cut Pro, or DaVinci Resolve to stabilize your footage.
Color Grading: Apply color grading to match the bright, vibrant aesthetic of drone footage.
Caution: Use reliable software for stabilizing your footage. Proper stabilization enhances the smoothness of your shots without introducing distortions or artifacts. Apply color grading carefully to enhance the visual appeal of your footage, ensuring it complements the overall aesthetic you are aiming for.
3. Creative Angles and Movements
A. Sweeping Pan:
Tripod Head: Use a tripod with a fluid head for smooth pans.
Handheld Pan: Move slowly and pivot your body to maintain stability.
Caution: Ensure the tripod is securely positioned to avoid instability during sweeping pans. Avoid sudden movements that may disrupt the smoothness of the shot. Move slowly and carefully to maintain stability while panning the handheld. Watch out for obstacles or uneven terrain that could cause imbalance.
B. Tracking Shots:
Follow Movement: Walk behind, beside, or in front of your subject, keeping the camera focused on them.
Stabilizer: Use a gimbal to maintain smooth footage while tracking.
Caution: Maintain a safe distance from the subject to prevent collisions while tracking. Be aware of your surroundings to avoid accidents. Familiarize yourself with the gimbal’s operation to ensure smooth footage. Check for any loose parts or malfunctions before use.
C. Reveal Shots:
Start Close: Begin with the camera close to an object, then pull back or raise it to reveal a larger scene.
Technique: Create a sense of discovery by revealing new elements of the scene.
Caution: Securely hold or mount the camera to prevent accidents when pulling back or raising it to reveal the scene. Avoid sudden movements to maintain stability. Practice the movement to achieve a controlled reveal without losing focus or overshooting.
D. Simulated Flyovers:
Technique: Hold the camera high and move it over landscapes or objects to mimic a drone flying overhead.
Lens Choice: Use a wide-angle lens to capture more of the environment.
Caution: Hold the camera firmly to prevent drops while simulating flyovers. Be cautious of obstacles and maintain awareness of your surroundings. Be mindful of potential distortion with wide-angle lenses, especially at the edges of the frame. Adjust framing and composition accordingly.
4. Tips for Better Execution
A. Plan Your Shots:
Storyboard: Sketch or write down your planned shots to visualize the sequence.
Rehearsal: Practice movements without recording first to ensure smooth execution.
Caution: Ensure your planned shots are feasible and safe to execute. Consider any potential hazards or obstacles that may affect your filming locations. Practice movements cautiously to avoid accidents or injuries. Be aware of your surroundings and any equipment limitations.
B. Controlled Breathing:
Technique: Breathe steadily and avoid holding your breath to prevent tension and shake.
Caution: Focus on breathing steadily to prevent tension and shake in your footage. Avoid sudden movements or disruptions that may affect the stability of your shots.
C. Use Objects for Perspective:
Foreground Elements: Include trees, buildings, or other objects in the foreground to create depth and motion.
Caution: Incorporate foreground elements carefully to enhance depth and motion in your shots. Be mindful of potential distractions or obstructions that may detract from the overall composition.
D. Edit Thoughtfully:
Transitions: Use smooth transitions between shots to maintain flow.
Motion Blur: Adding slight motion blur can enhance the realism of your shots.
Caution: Ensure transitions between shots are smooth and natural to maintain the flow of your video. Avoid abrupt changes that may disrupt the viewer’s experience. Use motion blur sparingly and appropriately to enhance realism in your footage. Avoid excessive blurring that may obscure important details or create visual confusion.
Summing Up:
Creating drone-like shots with a handheld camera is feasible with the right preparation and techniques. Start by equipping yourself with a stabilizer or gimbal to ensure smooth, shake-free footage, and opt for wide-angle lenses to capture expansive views. Practice smooth movements, like the “ninja walk,” to minimize bounce and instability while filming. Utilize elevated positions for high-angle shots, simulate crane and dolly movements with DIY setups, and employ slow motion for dramatic effects. In post-production, use stabilization software and color grading to enhance the visual quality of your footage.
Incorporating creative angles and movements can further enhance your shots. Techniques like sweeping pans, tracking shots, reveal shots, and simulated flyovers can mimic the dynamic perspectives typically achieved with drones. Plan your shots meticulously, practice your movements, and ensure smooth execution. By thoughtfully integrating foreground elements for depth and using smooth transitions in editing, you can produce professional-quality videos that capture the essence of drone footage without the need for expensive equipment. This approach not only broadens your creative horizons but also significantly enhances the production value of your projects.


